
Are you just one click away from sending your first cold email campaign? Then this post is for you. Hold your horses for a moment, and spare a few minutes to do a quick campaign audit before you click the ‘send’ button. Here’s what you should check to make sure your campaign is all set and ready to go.
Let’s start.
#1. Avoid narrow sending windows
You may be wondering now what the sending windows are. Before I go on to explain that, I’d like to shortly describe how Woodpecker email sending mechanism works.
Woodpecker sends your emails and follow-ups as if you did it manually – one by one with an irregular frequency, rather than in a machine-gun-fire-like manner as the email marketing tools do. The reason behind it is to make the sending process as human-like as possible.
Would you be able to send 200 emails in 1 hour by hand? Perhaps only if you copied and pasted the content relentlessly till your computer mouse or touchpad breaks to pieces. Since those who send identical, impersonal emails at a similar scale are usually spammers, this kind of sending activity triggers spam filters. Woodpecker email sending mechanism is designed to boost your deliverability rate and keep you away from blacklists.
Don’t worry if you notice that it has already been a couple of hours since you run your campaign, and yet, just a few emails have been sent so far. Everything is under control.
Woodpecker randomizes the sending frequency and adjusts the number of emails to be sent during a timeframe you set up. Therefore, it’s better to schedule larger sending windows in order to ensure all your emails are delivered that day.
Here’s a bonus tip for you: once the campaign is running, you can check the stats and see who from your prospect list already received a specific email.
For a further read, here’s one of our articles that describes how your emails and follow-ups will be sent by Woodpecker or this help article that helps you set it up after you sign up for the free trial.
#2. Give your prospect a way to opt-out
According to the CAN-SPAM act, GDPR and similar regulations, a cold email receiver should be given an option to resign from getting any further emails from you. To comply with these regulations, you should add a short disclaimer at the bottom of a message to let a prospect know they can be removed from further correspondence should they want to. It’s also possible to automate this process by replacing a disclaimer with a link.
In Woodpecker there’s a way to add the opt-out link in the form of a snippet. The snippet is called ‘unsubscribe’ by default, but you can change the name, for example, to ‘click here’ or anything that could be seamlessly inserted into your email copy. It’s the last snippet in the campaign editor. You can see the unsubscribe snippet on the snippet list here:
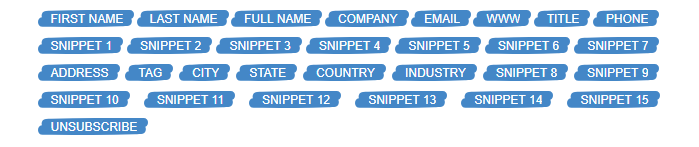
Check out more suggestions on including an opt-out here.
#3. Check the spelling before you click ‘send’
Do you know the proverb “First impression is the last impression”? Spelling mistakes and bad grammar may ruin your professional image in a twinkling of an eye. An email full of errors carries a hidden message: the sender is sloppy and disorganized, thus not trustworthy to make business with. Your email goes straight to trash.
Is there a way to avoid grammar mistakes? Try free apps, such as Grammarly or Hemingway, it takes just a minute to check the spelling and grammar before you send out a campaign. Grammarly even checks your text at the very moment of writing so you can correct the mistakes on the go.
How to spell check your email copy?
- Paste your email into an online text editor or straight into the spell-checking app.
- Wait for it to proofread your email copy and correct your mistakes.
- Paste your email into Notepad or similar editor that reads .txt files, so there’s no overwritten HTML code.
- Put it back to Woodpecker.
Make the grammar and spell check a mandatory step in the campaign creation process.
#4. Preview the email before sending
Snippets are real game changers in terms of email personalization at scale. They allow you to insert unique text fragments, for example, an individual’s name, into the more generic email copy, thus making it more personal. Moreover, they boost your email deliverability rates.
A snippet can be any information about your prospect you find worth mentioning in the email: their recent job promotion, mutual interests you both have or the latest industry conference you both attended. While building your prospect list look for something that could break the ice or be a conversation hook.
Here’s a blog post that tells you what sort of information you can put in a snippet.
While drafting your message, sprinkle the content with snippets. Be careful about how you insert them in the email copy, though. Don’t confuse the snippets. Otherwise, your message will look like a mess and your prospects will be baffled, to say the least. Such a fail won’t make you look like a serious business partner too, don’t you agree?
There’s one rule worth following if you want to save yourself the embarrassment: always double check the email before sending. In Woodpecker, there’s a preview option that allows you to see the email just like a prospect will see it in their inbox – with all the snippets visible as real text. We recommend you always use it. It’s better to be safe than sorry.
I have this gif for you which shows you how the preview works. As you can observe, the email addressed to Jessie Jones have some empty snippets, because the CSV file was incomplete.
Check out this help article to preview if your snippets before sending the campaign:
How to use our custom fields (snippets)? >>
#5. Send a test email
Your next step should be sending a test email to your own email address to examine whether all the components of your cold email look and work as expected. Check whether:
- the links are working,
- the signature is correctly formatted,
- the font looks good,
- the pictures are accurately displayed.
Now it’s your turn – try sending a test message in Woodpecker. Once you have your email copy ready, you can find the option ‘Send test mail’ at the bottom of the campaign editor. If possible send a test message to an email address set up on a different domain than the one you will send it from. Check whether everything I mentioned above is ok.
Congrats, your campaign is almost ready to go!
#6. Test the technical settings
The accuracy of email content is just one side of the coin. The other side is the correctness of the technical settings. This requires some backstage work you need to do in order to ensure your emails will be delivered straight to your prospects’ main inbox instead of the promotions tab or a spam folder.
Using Mail-Tester a quick way to test if your email address is all set for sending your first campaign. It generates a report for you that includes the information about your SPF & DKIM configuration, email server IP, and potential blacklisting. Thanks to this quick diagnosis you will be able to identify the most common issues with technical setup. Apart from that, it also performs a spam check of the content of your email.
See how Mail-Tester and other similar tools may help you assess and improve your email deliverability.
Email deliverability is a topic you should definitely dive deeper into. It’s crucial for you to know and understand how the email sending mechanism works in order to optimize your future campaigns and reach all your prospects.
Here are three resources for you to begin with:
- What is SPF & DKIM? And Why You Want to Have It Set Up >>
- 14 Deliverability Checks to Carry Out Before Sending Your Cold Email Campaign >>
Back to you
Before you send your first campaign in Woodpecker run a quick audit: ensure your copy is mistake-free by running a quick spell-check, preview the message and send a test email to spot any possible formatting errors, non-working links or wrongly inserted snippets. Keep in mind how the email sending mechanism works and don’t forget to perform a technical check-up as well as optimize your sending time.
If all the boxes are ticked off, you have a green light to send your first campaign. Fingers crossed!
READ ALSO
Woodpecker.co Quickstart Guide: How to set up a cold email campaign
Nifty cold emails work. Nifty cold emails with follow-up work miracles. But the sending cold emails by hand sucks because it takes way too much time. That’s not a made-up marketing scenario. That’s life. And if you’ve ever been sending your cold emails manually, you know that. We created Woodpecker because we had been sending our cold emails by hand and it was a problem we needed to solve. Now you can use our solution to fix it up for yourself. Here’s how to set up a cold email campaign in Woodpecker to automate outreach in a few simple steps.
Step-by-Step Practical Guide to a Cold Email Campaign That Gets Delivered
Sending an automated cold email campaign is just a start. In the end, you want your emails to actually get to your prospects' inboxes. And to make that happen, it's crucial that you properly plan and set up your cold email campaign in every detail. I wrote this post in cooperation with our Support team and our Head of Integration & Deliverability, because we observed that many of our users still need help when it comes to properly adjusting their cold email campaign settings.
How to Start B2B Cold Email Outreach?
Here's what it usually looks like: we read Predictable Revenue by Aaron Ross, we read some articles by people who have succeeded in doing cold email, we download some PDFs from the people who have gained lots of new customers and partners for their businesses thanks to cold emails. We soak up all the theory until one day we think to ourselves: ok, now it's time for practice. Sooo, where do I start... I mean, what do I do literally? This post proposes an answer to this crucial question.